> For the complete documentation index, see [llms.txt](https://s-organization-887.gitbook.io/hostyle-web/llms.txt). Markdown versions of documentation pages are available by appending `.md` to page URLs; this page is available as [Markdown](https://s-organization-887.gitbook.io/hostyle-web/undefined/editor.md).
# 1단계 - 자체 웹 소스 셋팅
## – HTML / PHP 사용자용
***
### 1. 시작하기
#### ✅ 이 메뉴얼은 어떤 분을 위한 것인가요?
* **서비스 결제 까지 완료되어 생성된 상태로 WordPress 홈페이지 빌드 솔루션을 사용하지 않고 자체 개발된 HTML / PHP / JS / CSS 소스파일을 직접 넣어 사용하실 수 있습니다.**
* Mysql Database / ID / PW 가 제공되어 자체구축한 웹페이지에서 mysql 연동이 가능합니다. \
(phpmyadmin 제공)
#### 📦 Hostyle 서비스란?
* 가입/결제 후 자동으로 웹서버, 데이터베이스, 도메인까지 제공되는 웹호스팅 서비스입니다.
* cPanel 기반으로 제공되며, 개발자가 원하는 방식으로 자유롭게 사용 가능합니다.
***
### 2. 내 서버에 접속하기
#### 🚀 1. cPanel 접속 방법
1. 대시보드에서 생성한 서버의 **\[cPanel 바로가기]** 클릭
* 버튼을 누르면 자동으로 로그인됩니다.
***
### 3. HTML / PHP 업로드 방법
#### 📁 1. 파일 매니저로 접속하기
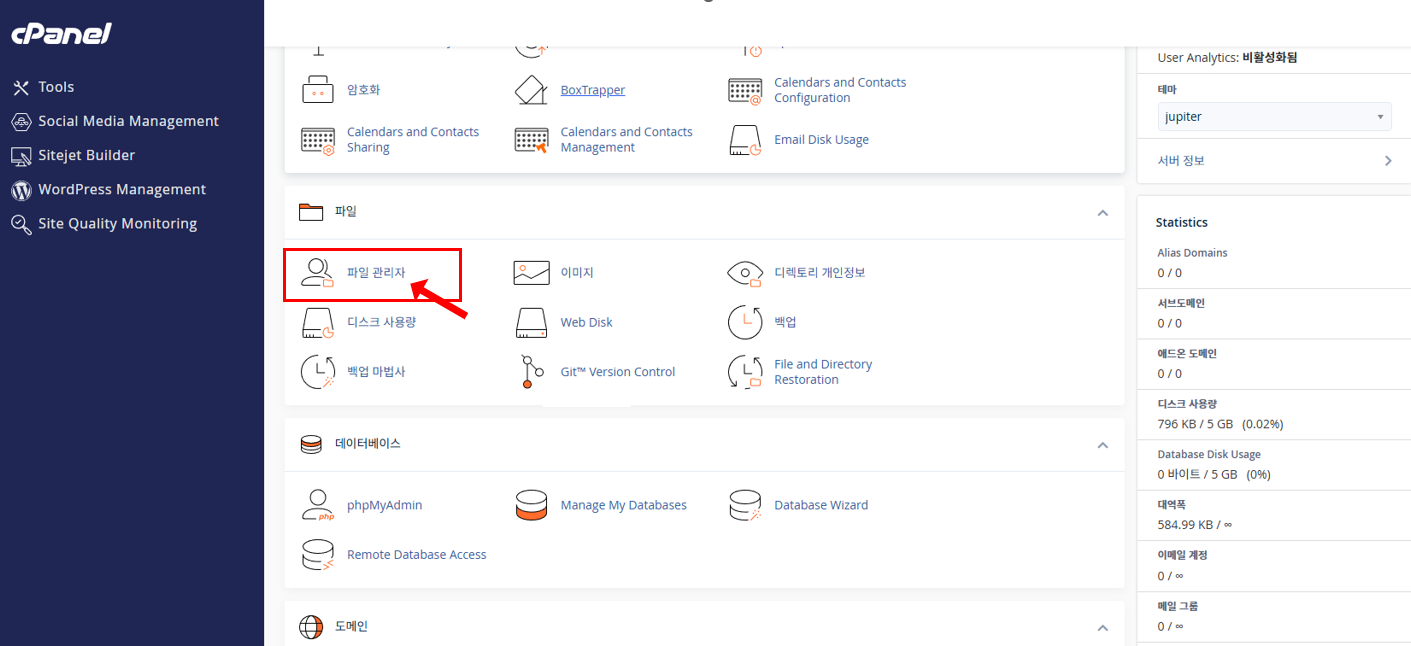
1. cPanel 접속 후, **파일 관리자(File Manager)** 클릭
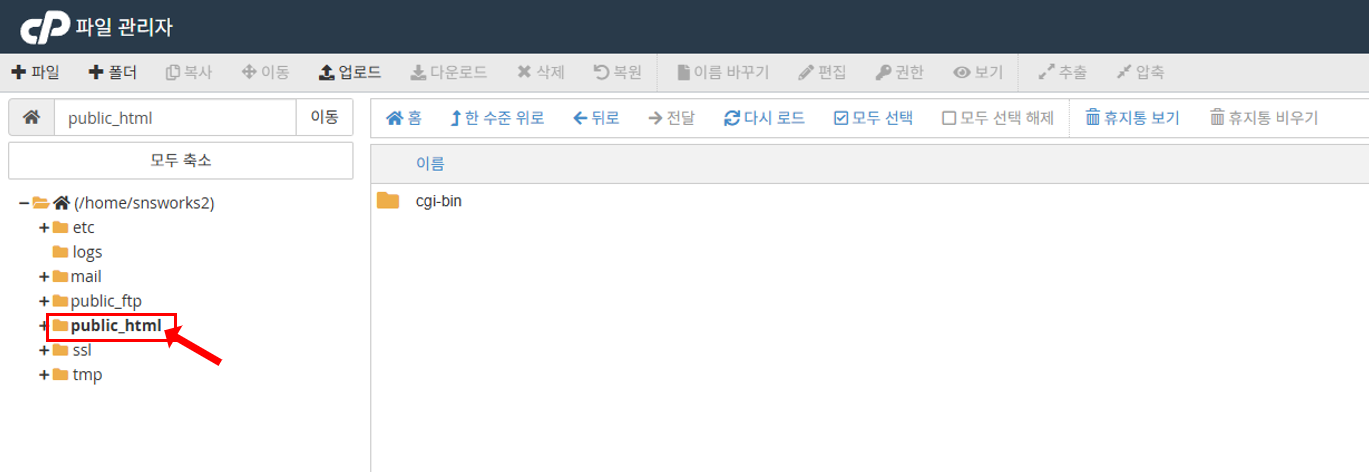
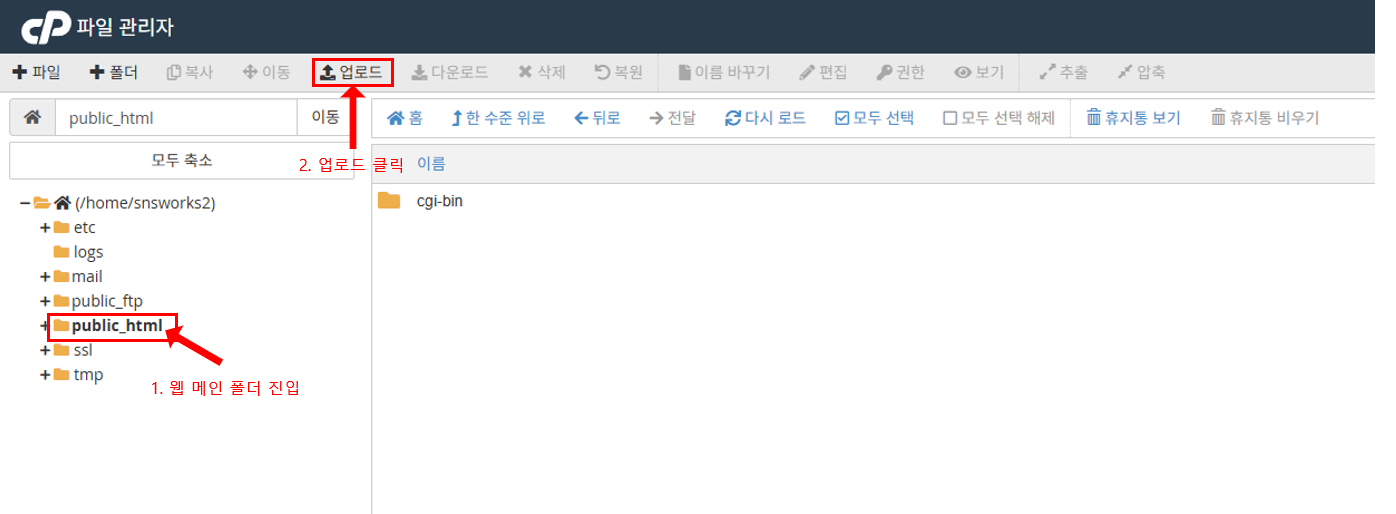
2. 왼쪽에서 `public_html` 폴더를 선택합니다.
{% hint style="info" %}
* public\_html 폴더 안에 들어가면 웹으로 공개가 됩니다. (웹페이지 메인 폴더)
* 도메인 접속시 public\_html 안에 index 페이지로 리디렉션 됩니다.
* public\_html 폴더안에 example 폴더를 만들면 폴더로 진입할 수 있습니다.
{% endhint %}
***
#### 📥 2. HTML 또는 PHP 파일 업로드
* `index.html` 또는 `index.php` 파일을 업로드하면 바로 홈페이지가 보여집니다.
* 기본으로 있는 `index.php`, `default.html` 등은 삭제해 주세요.
> ⚠️ `index.html`과 `index.php`가 동시에 있을 경우 `index.html`이 우선됩니다.
{% hint style="info" %}
* 파일업로드는 드래그앤드롭 / Select File 직접 업로드를 지원합니다.
* 파일수량이 많을 경우 압축하여 업로드를 권장드립니다.
{% endhint %}
업로드 완료 후 뒤로가기 버튼 클릭
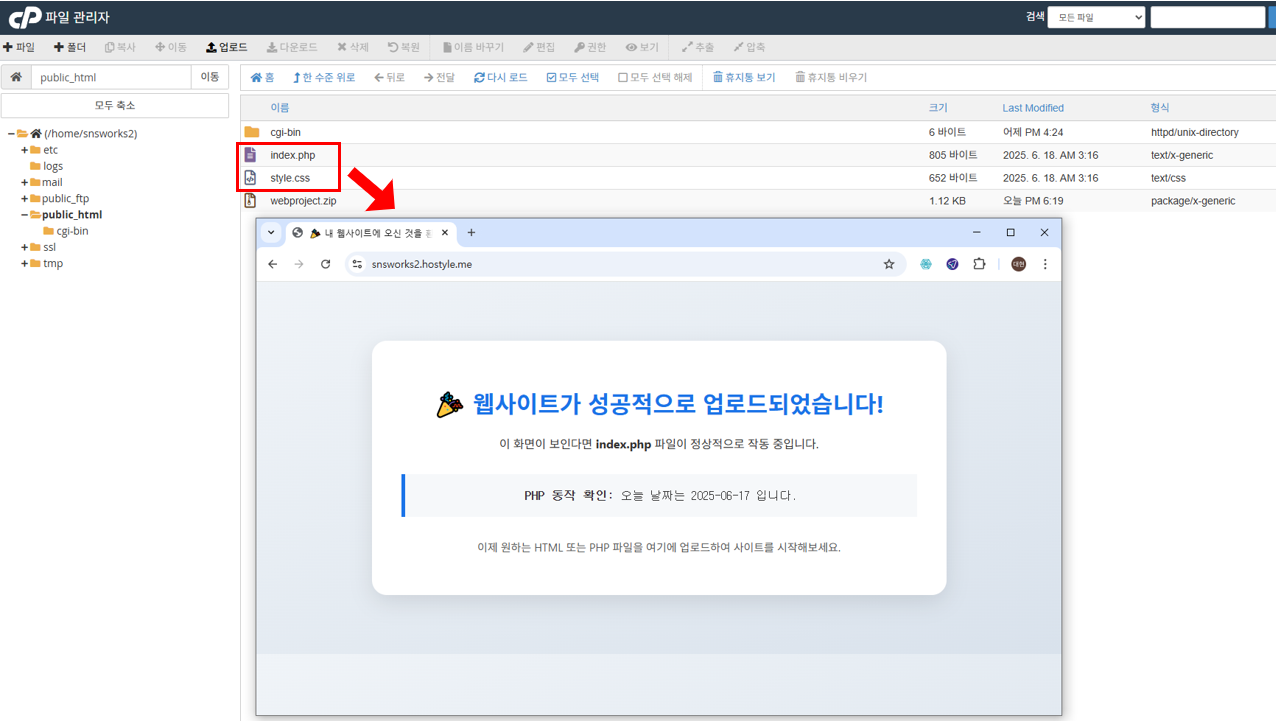
업로드된 압축파일을 풀기
> * 정상적으로 압축 풀기 후 index.php 와 디자인 css 파일이 업로드되어 \
> 도메인 접속시 웹페이지가 출력됩니다.
> * 해당 이미지의 페이지는 가이드를 위한 임의 제작된 디자인 페이지 입니다.
***
### 5. 데이터베이스 연결 (선택)
#### 🧾 DB 정보 확인 방법
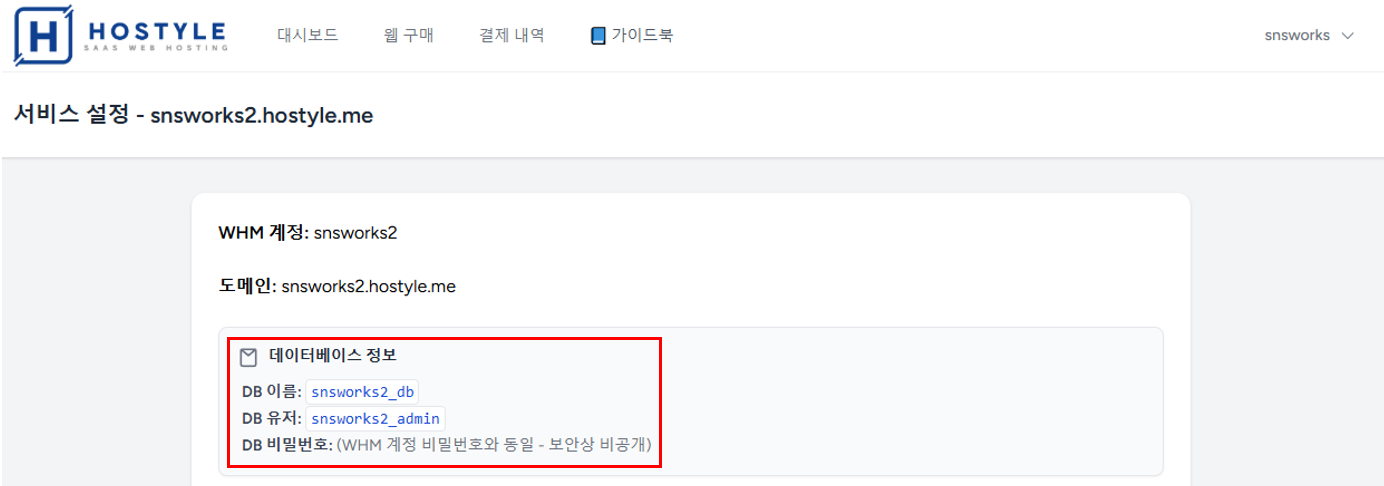
* 대시보드 → **\[설정]** 클릭 시 DB 이름, 사용자명을 확인할 수 있습니다.
***
#### 📄 PHP DB 연결 예시 코드
* 하단은 php<->mysql 기본 연결 예시코드 입니다.\
연동은 보유하신 php 소스의 맞게 사용하시면 됩니다.
```php
connect_error) {
die('MySQL 연결 실패: ' . $mysqli->connect_error);
}
echo '연결 성공!';
?>
```